
Adding a Batch of Clients
-
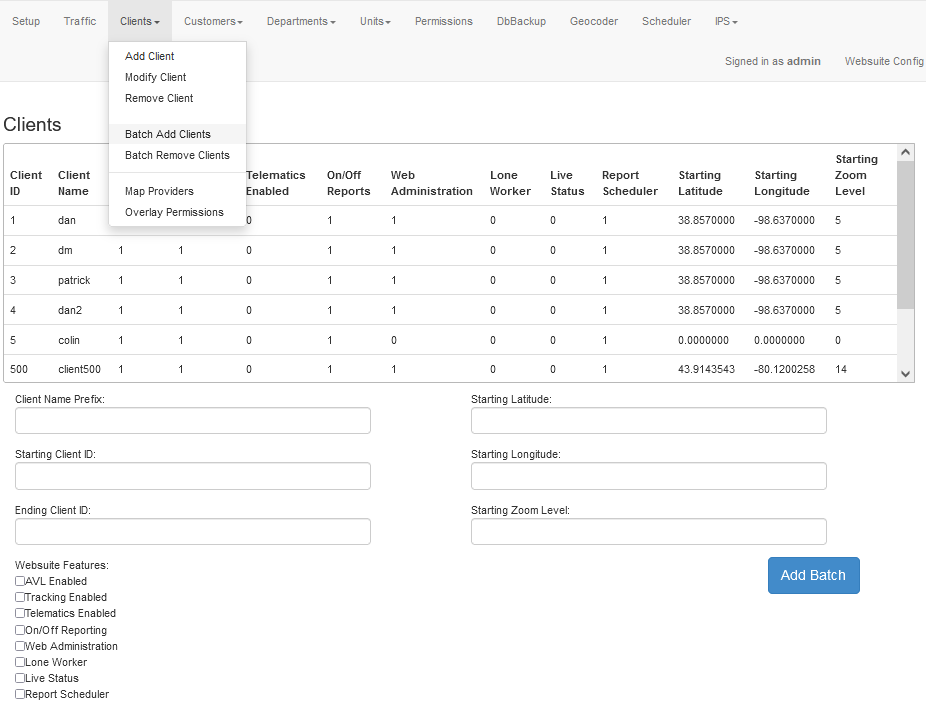
To access the page to add a batch of clients, along the top navigation go to Clients then Batch Add Clients.
-
The table displays all existing clients that have access to the Websuite. Each Client must have a Unique Client ID.
-
Below that table is the form used to add the new Clients to the FleetManager.
-
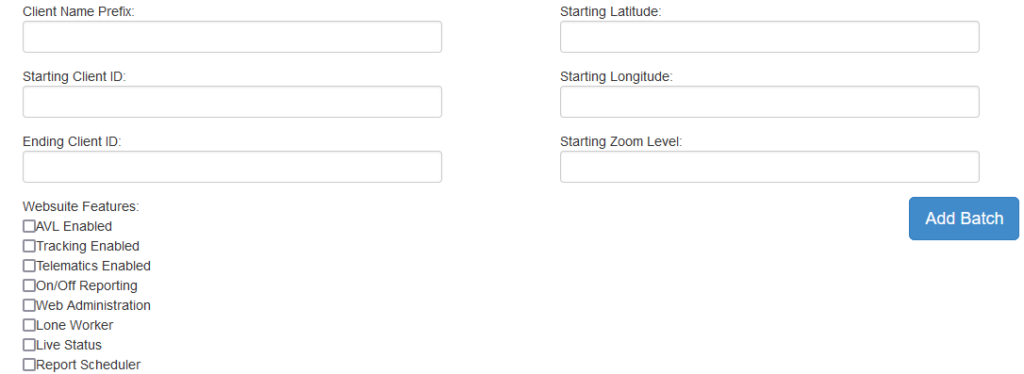
Enter the Client Name Prefix, Starting Client ID, Ending Client ID.
Client Name Prefix – This will be used as the first part of the Client’s name.
Starting Client ID – The Client ID that the first Client will have.
Ending Client ID – The Client ID the last Client will have.
-
Select which Websuite Features the Clients will have access to.
AVL Enabled – Select to allow the Client access to the Live AVL screen in the Websuite.
Tracking Enabled – Select to allow the Client access to the Tracking screen in the Websuite.
Telematics Enabled – Select to allow the Client access to the Telematics screen in the Websuite.
On/Off Reporting – Select to allow the Client access to the On/Off Reporting screen in the Websuite.
Web Administrator – Select to designate this client as a Web Administrator with the ability to modify Unit names.
Lone Worker – Select to allow the Client access to the Lone Worker screen in the Websuite.
Live Status – Select to allow the Client access to the Live Status screen in the Websuite.
Report Scheduler – Select to allow the Client access to the Report Scheduler screen in the Websuite.
-
Optionally Set the Starting Latitude, Starting Longitude, and Starting Zoom Level.
If left at default when the user logs in they will be shown the world map.
Starting Latitude – This will set the default latitude the map will be centred around when the Client logs into the Websuite.
Starting Longitude – This will set the default longitude the map will be centred around when the Client logs into the Websuite.
Starting Zoom Level – This will set the default zoom level of the map when the Client logs into the Websuite.
-
To add the Clients click the Add Batch button.
The following form needs to be filled out to grant new clients access to the Websuite. When adding Clients this way, each Client is added sequentially from the starting ID up to the ending ID.