
Programming a Data Repeater – Capacity Plus
-
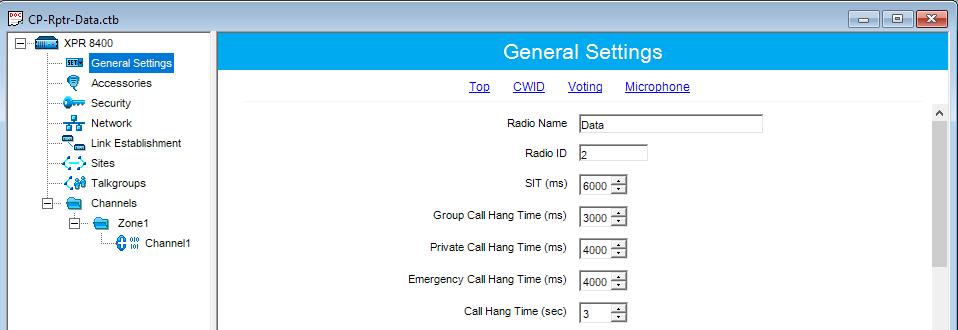
Set a Radio Name for your repeater.
-
Set a Radio ID for your repeater. This must be unique.
From the left navigation bar, choose General Settings.

-
Select the Privacy Type. All radios on your system must have the same privacy type.
Select Security from the left menu.
-
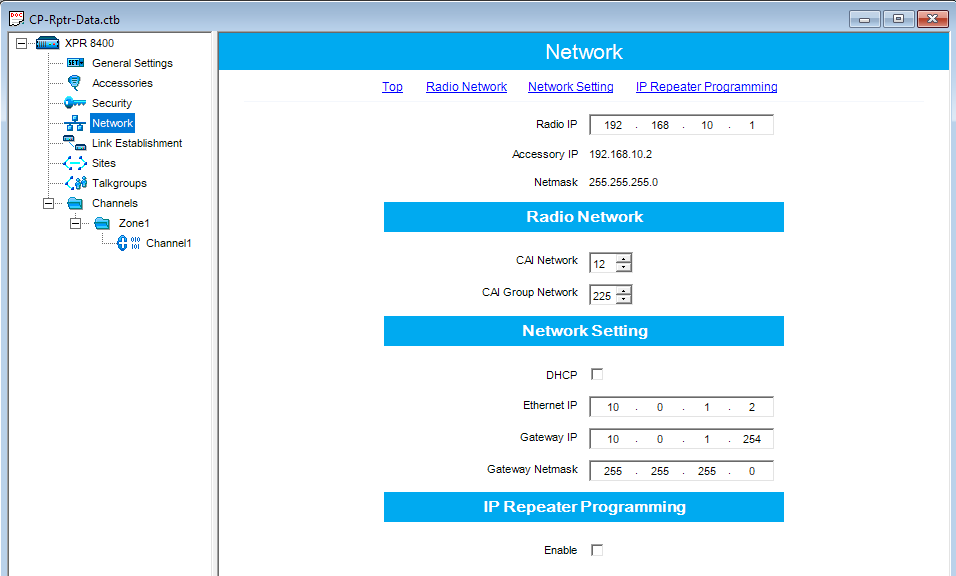
Set a Radio IP. This is used for programming.
-
Under Network Setting enter your IP configuration (used for IP communication).
Select Network from the left navigation menu.

-
Ensure Link Type is set to Peer.
-
Ensure the Master IP is set to the same as the IP as your Voice Repeater.
-
Specify your desired Master UDP Port and UDP Port.
-
Under Capacity Plus set your Site ID and Site Alias.
-
Set a Reset Channel/Site IP and Rest Channel/Site UDP Port.
In the left menu, navigate to Link Establishment.
-
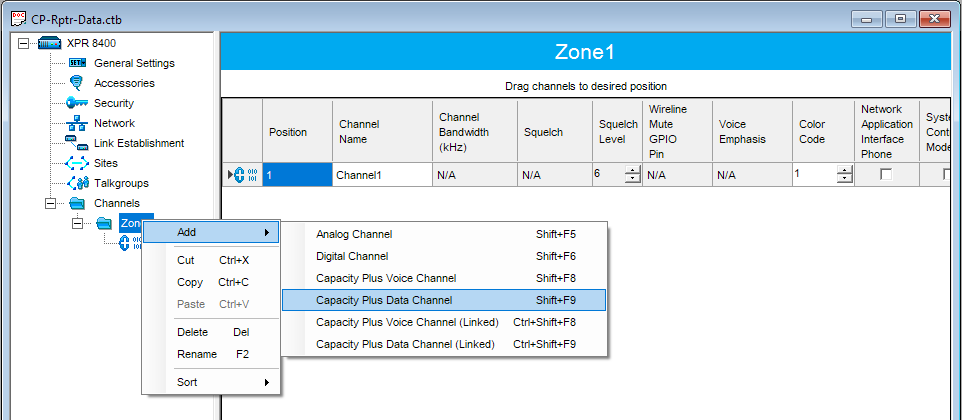
Navigate to your channel zones.
-
Right Click and choose Add > Capacity Plus Data Channel.
You must create a Capacity Plus Data Channel.
-
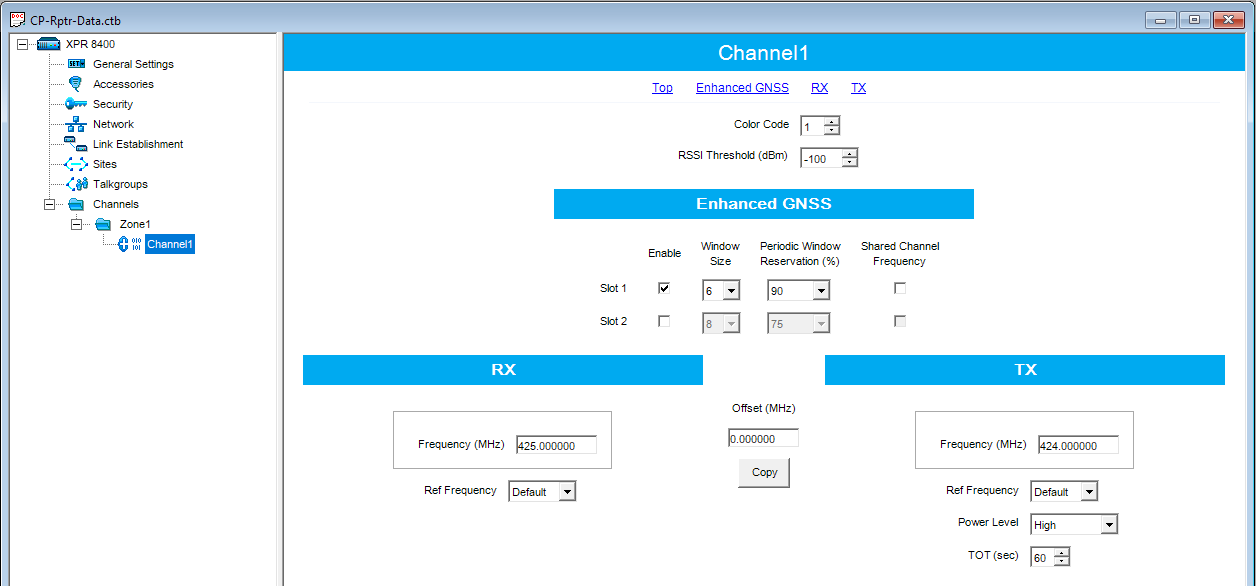
Set your Color Code.
-
Set your RX and TX Frequencies.
-
If you have Enhanced GPS purchased on your repeater, ensure it is only enabled on one slot. Some data cannot be transferred on enhanced slots, so it is important to leave at least one Data slot as non-enhanced.
Set your Window Size based on your security type:
No Security – 6
Basic Security – 7
Enhanced Security – 8
Set the Periodic Window Reservation (%) to 90.
Configure your Capacity Plus Data Channel as follows: