
Configuring MNIS & DDMS – Conventional
-
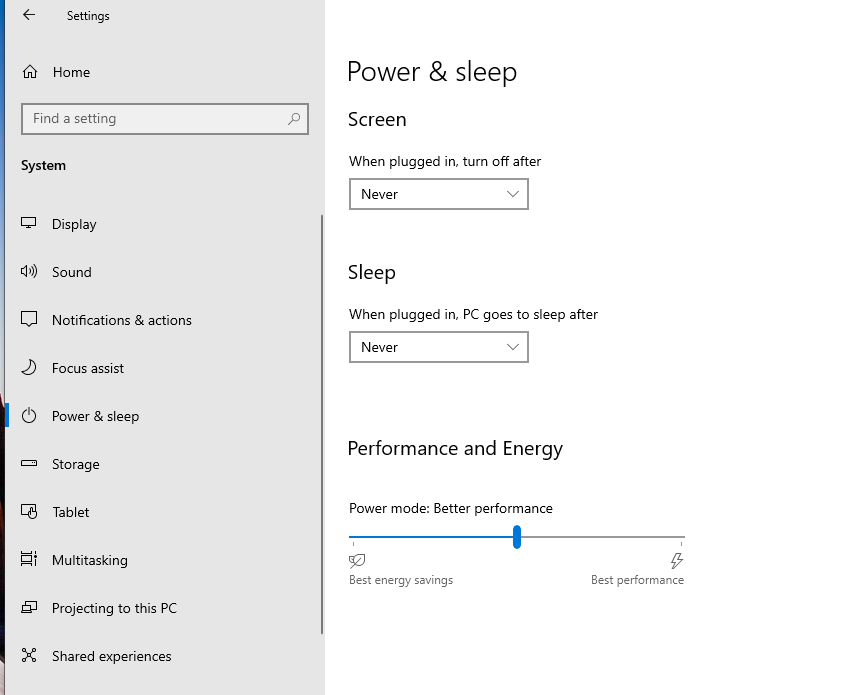
Choose Power & sleep.
-
Set Sleep to Never.
From the Start menu, click Settings > System.
-
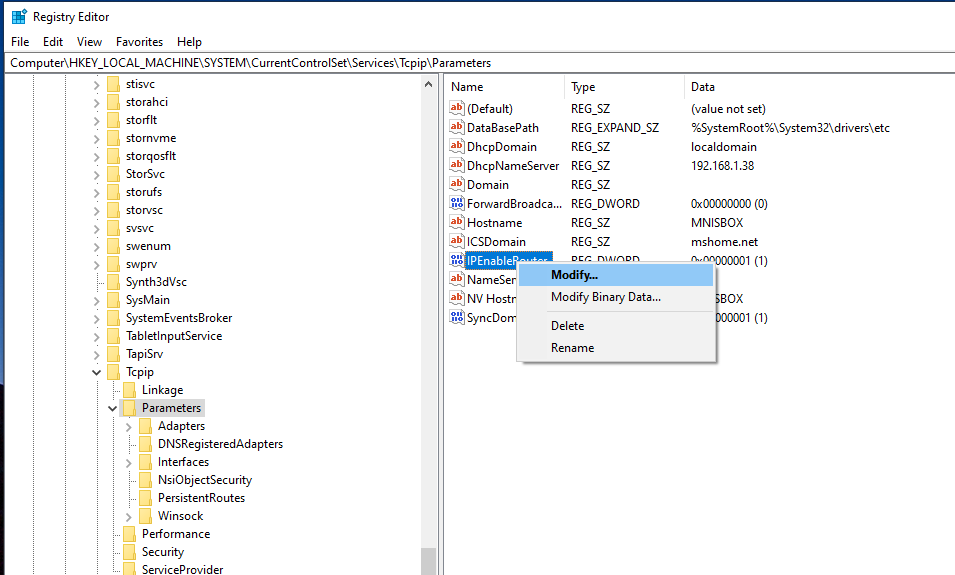
Using the navigation menu on the left, navigate to Computer\HKEY_LOCAL_MACHINE\SYSTEM\CurrentControlSet\Services\Tcpip\Parameters
-
Right click on IPEnableRouter and choose Modify…
MNIS requires a static route to be enabled from the registry editor. From the Start menu, start typing Registry in the search bar. Choose Registry Editor.
-
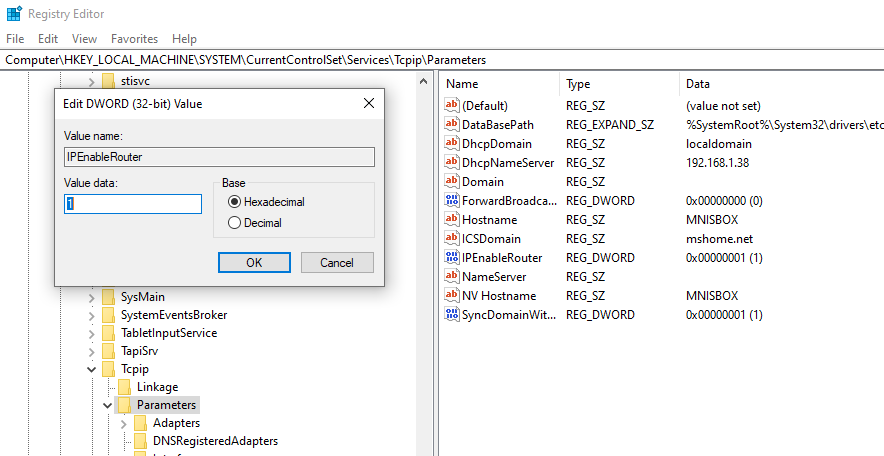
Change IPEnableRouter from 0 to 1.
-
Choose OK. The computer should be restarted after making this change.
-
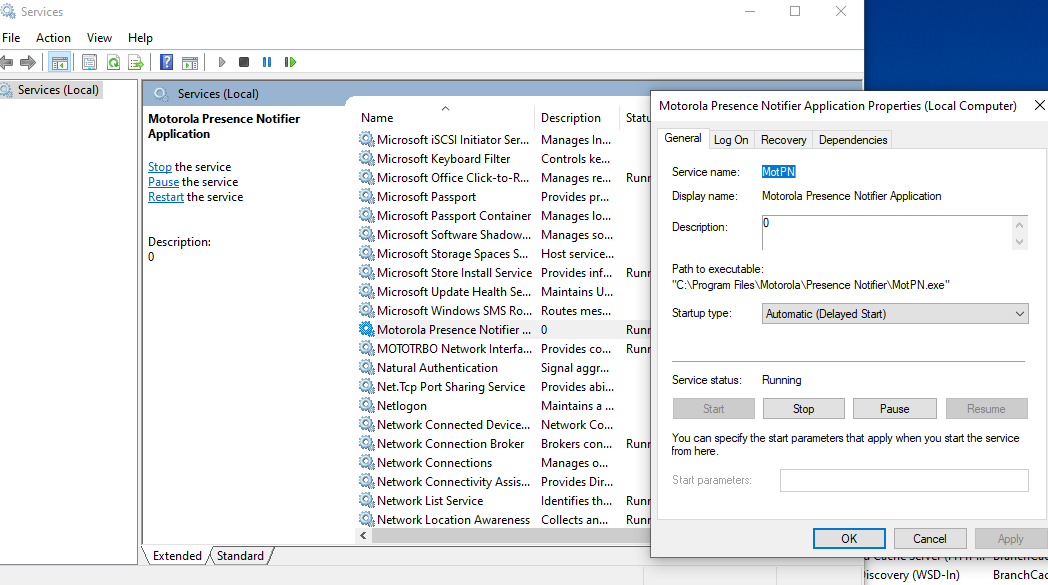
From the Start menu, search for and open Services.
-
Right click Motorola Presence Notifier and choose Properties. Then set Startup type to Automatic (Delayed Start).
DDMS software is provided by Motorola. Install your DDMS software by following the instructions in the install wizard. After successful installation:
-
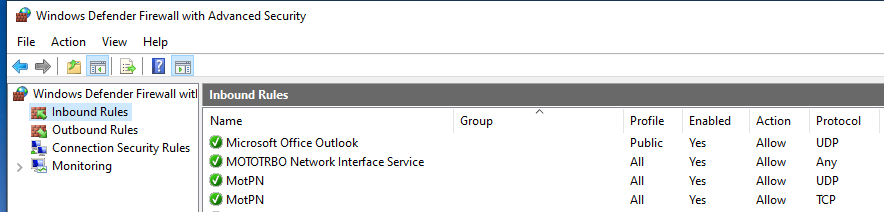
Verify that an Inbound rule has been added for MotPN with the UDP Protocol.
-
Verify that an Inbound rule has been added for MotPN with the TCP Protocol.
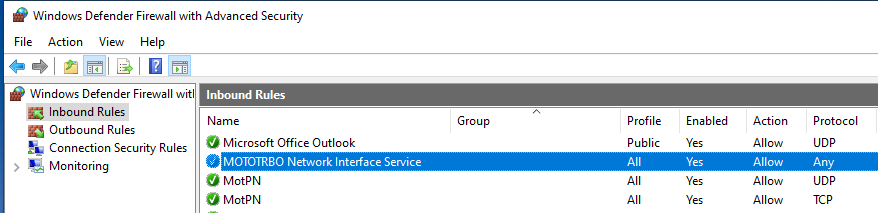
Open Windows Defender Firewall and navigate to the Inbound Rules.
-
Verify that an Inbound rule has been added for MOTOTRBO Network Interface Service.
MNIS software is provided by Motorola. Install your MNIS software by following the instructions in the install wizard. After successful installation Open Windows Defender Firewall and navigate to the Inbound Rules.
-
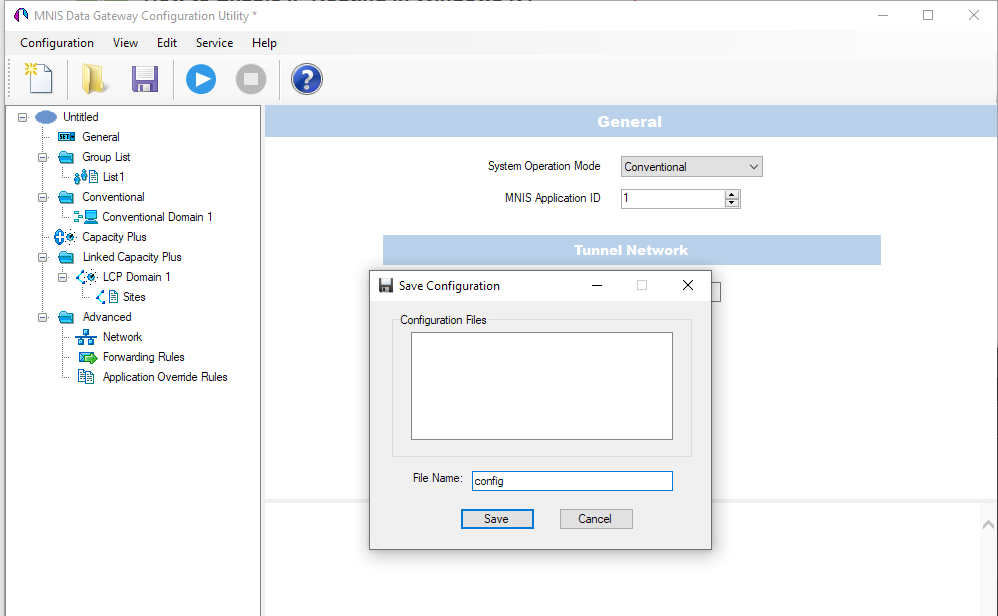
If you do not already have a configuration file, create a new one with the New button on the top left.
-
Ensure an MNIS Application ID is entered.
-
Save your configuration with the Floppy Disk Save button on the top left. Enter a name for the file and press Save.
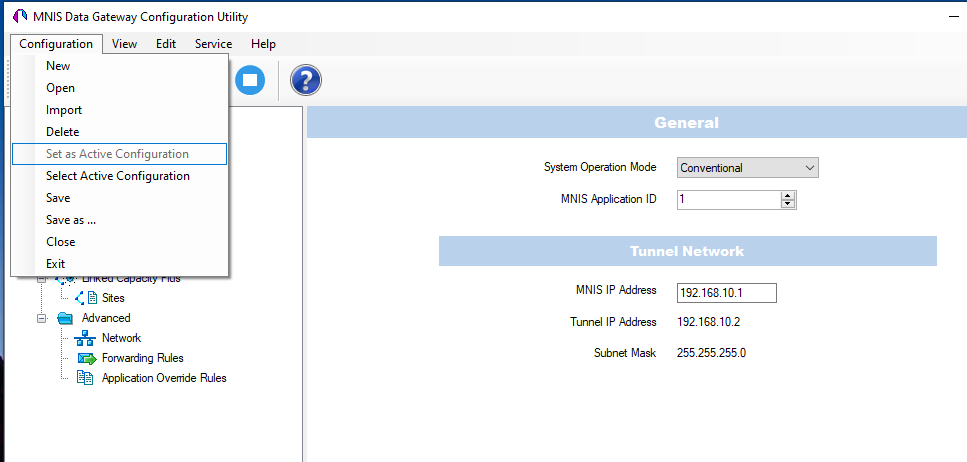
Open the MNIS Data Gateway Configuration Utility.
-
Choose Configuration from the top menu.
-
Choose Set as Active Configuration. If the option is not clickable, the current configuration is already set as active.
Ensure the new configuration file is set as the Active Configuration.
-
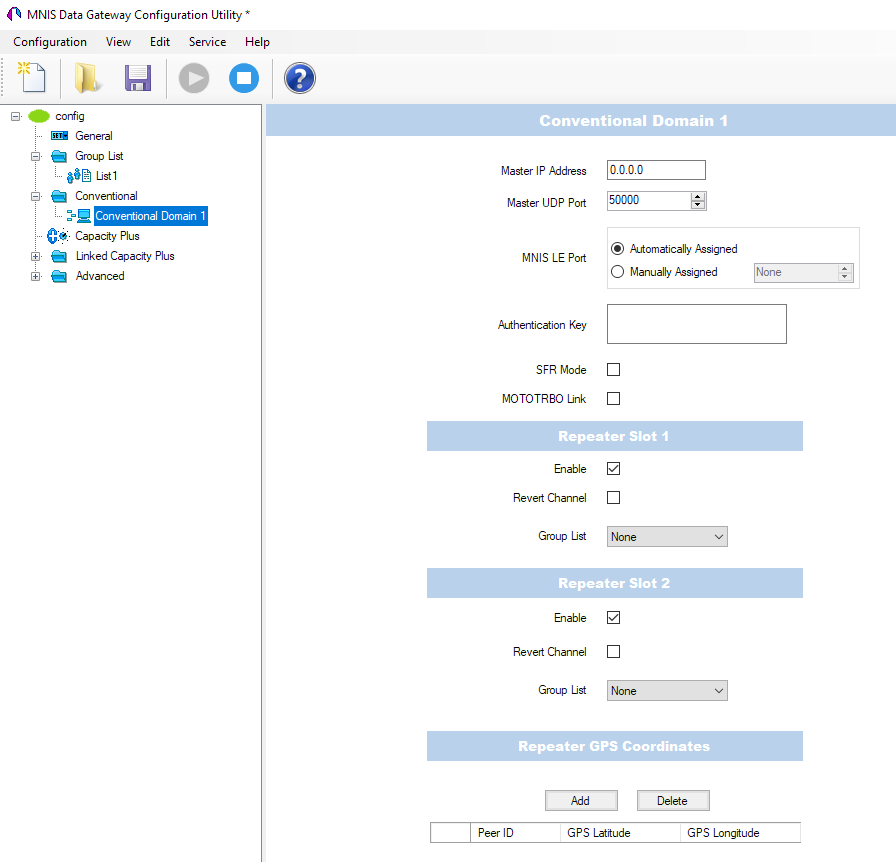
Enter the Master IP Address and Master UDP Port of the Master Repeater.
-
MNIS LE Port should be set to Automatically Assigned.
-
Configure each Repeater Slot to match your repeater configuration.
Enable allows the MNIS to send or receive data over this slot.
Revert sets a slot to a revert channel. When enabled, the MNIS will not send data messages over this slot, however the message could still be received.
Group List indicates to the MNIS the groups that it can receive from or transmit over the slot. These may be created under Group List in the left navigation menu.
A conventional domain must be configured under Conventional, right click and choose Add.
-
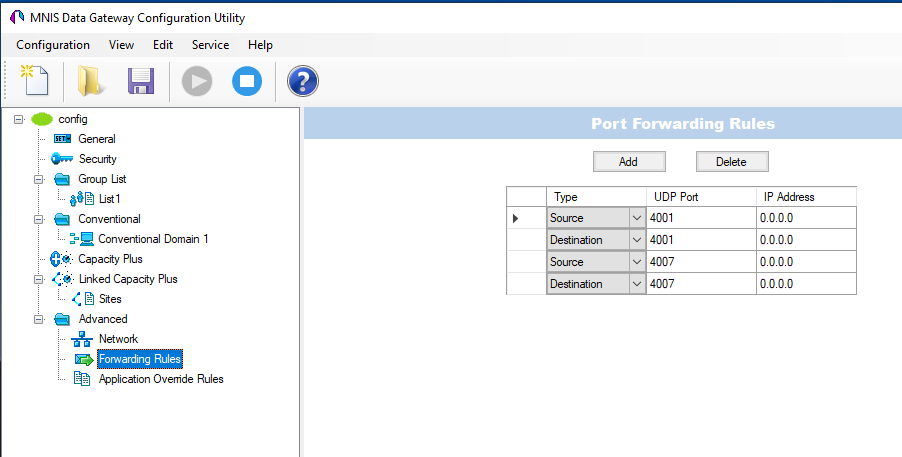
Verify that a Source rule and Destination rule have been added for Location Server (UDP port 4001 by default). If not, add them now with the Add button.
-
Verify that a Source rule and Destination rule have been added for TMS (UDP port 4007 by default). If not, add them now with the Add button.
Under Advanced, navigate to Forwarding Rules.