
Step 4 – Creating Initial User Setup
-
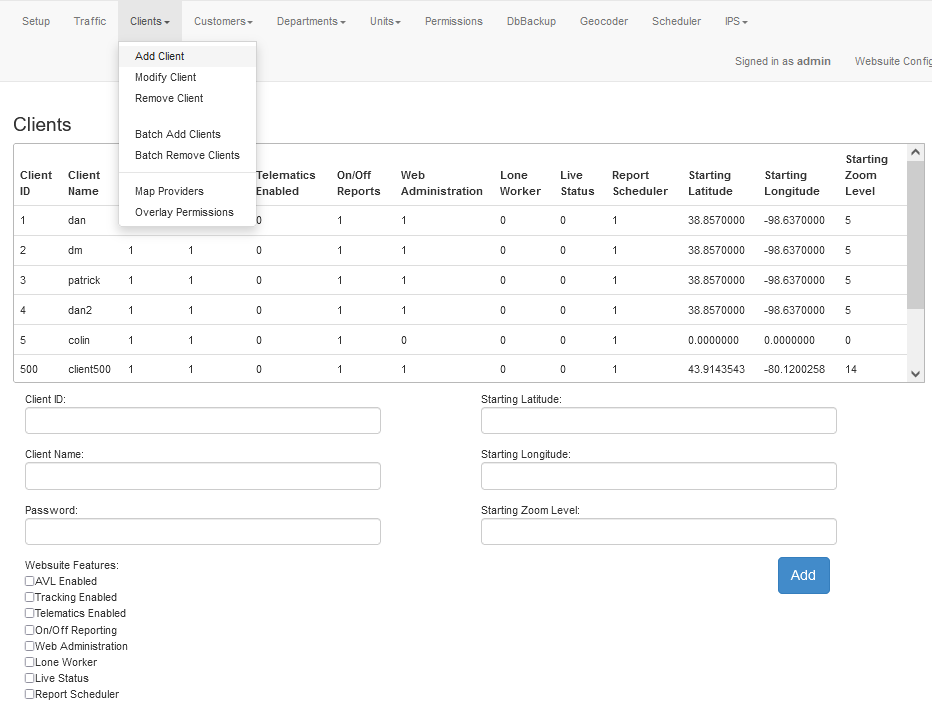
To access the page to add a client, along the top navigation go to Clients then Add Client.
-
The table displays all existing clients that have access to the Websuite. Each Client must have a Unique Client ID.
-
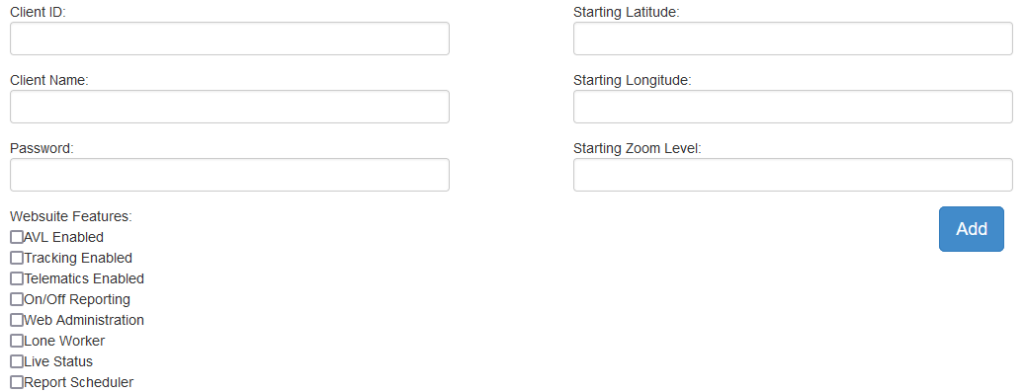
Below that table is the form used to add a new Client to the FleetManager.
-
Enter the Client ID, Client Name, and Password for the client.
Client ID – This will be used as the unique numeric ID for the Client. This can not be changed later.
Client Name – This will act as the username for the Client to login to the Websuite with.
Password – This will be the password that the Client will need to use to login.
-
Select which Websuite Features the Client will have access to.
AVL Enabled – Select to allow the Client access to the Live AVL screen in the Websuite.
Tracking Enabled – Select to allow the Client access to the Tracking screen in the Websuite.
Telematics Enabled – Select to allow the Client access to the Telematics screen in the Websuite.
On/Off Reporting – Select to allow the Client access to the On/Off Reporting screen in the Websuite.
Web Administrator – Select to designate this client as a Web Administrator with the ability to modify Unit names.
Lone Worker – Select to allow the Client access to the Lone Worker screen in the Websuite.
Live Status – Select to allow the Client access to the Live Status screen in the Websuite.
Report Scheduler – Select to allow the Client access to the Report Scheduler screen in the Websuite.
-
Optionally Set the Starting Latitude, Starting Longitude, and Starting Zoom Level.
If left at default when the user logs in they will be shown the world map.
Starting Latitude – This will set the default latitude the map will be centred around when the Client logs into the Websuite.
Starting Longitude – This will set the default longitude the map will be centred around when the Client logs into the Websuite.
Starting Zoom Level – This will set the default zoom level of the map when the Client logs into the Websuite.
-
To add the Client click the Add button.
-
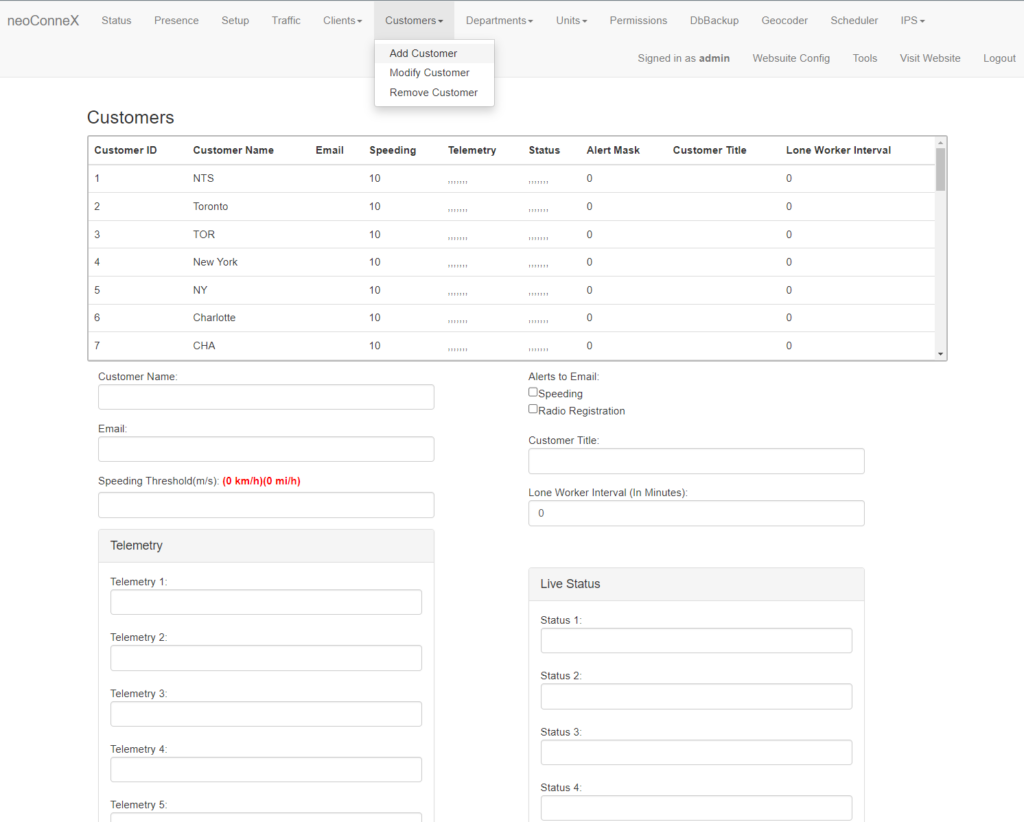
To access the page to add a customer, along the top navigation go to Customers then Add Customer.
-
The table will display all created customers.
-
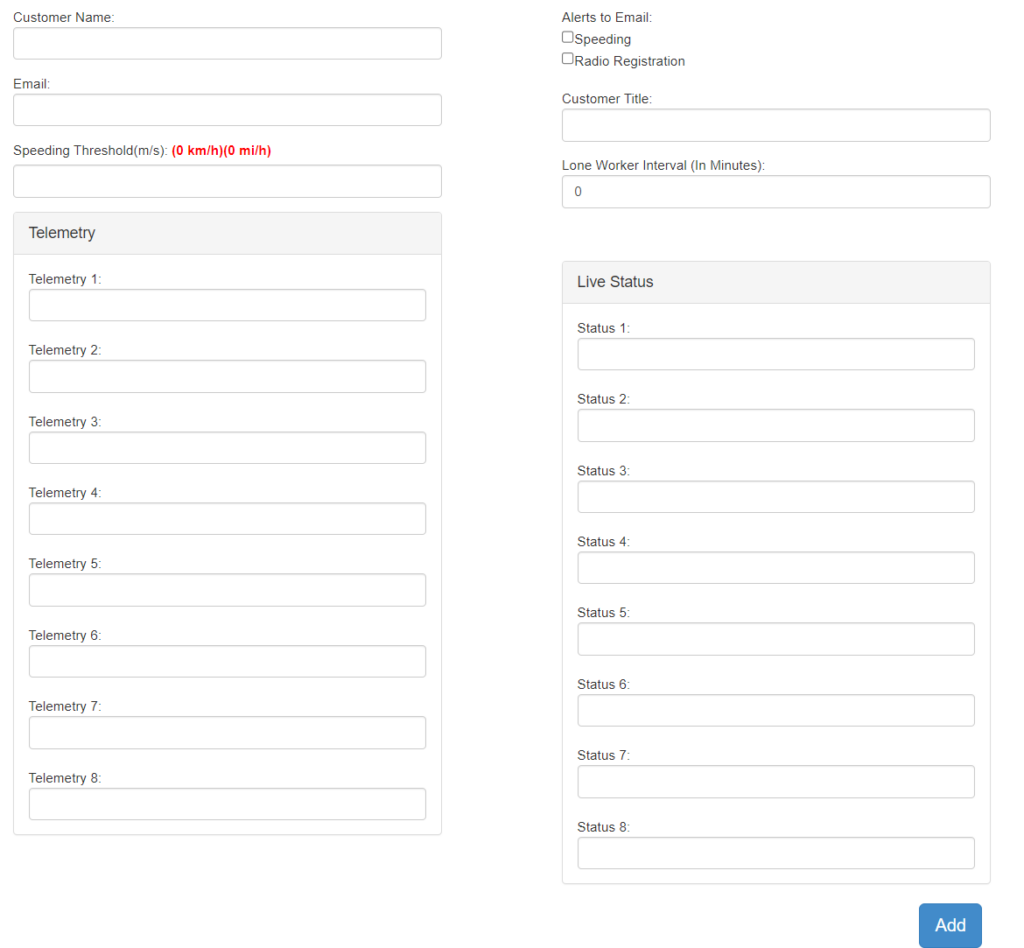
Below that table is the form used to add a new Customer to the FleetManager.
-
Enter a Customer Name. This is usually the name of your company, or the company using the Fleet Manager.
Email – Speeding Alerts or Radio Registrations will be sent to this email address. Choose what alerts to send by checking an option under Alerts to Email.
-
Speeding Threshold – Specifies the speed (in m/s) at which the speeding alarm will be raised in the clients.
-
Choose Add to create your new customer.
-
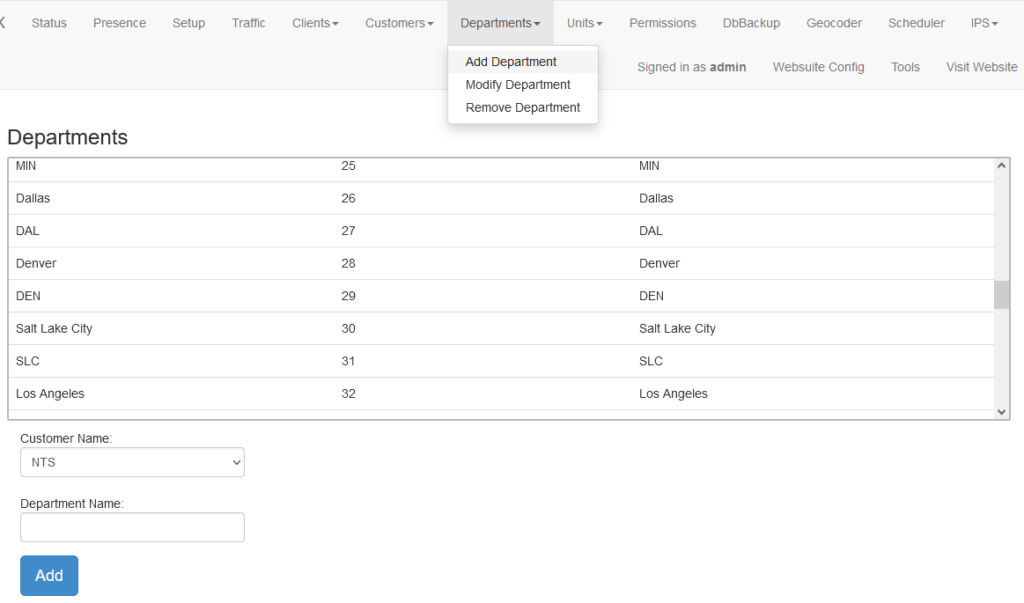
To access the page to add a department, along the top navigation go to Departments then Add Department.
-
The table will display all created departments.
-
The form below is used to add a new Department.
Customer Name – This is a dropdown to select what Customer the new Department will be assigned to. Choose a customer you previously created.
Department Name – This will be the name of the new Department. Enter a name.
Once entered, click the Add button.
-
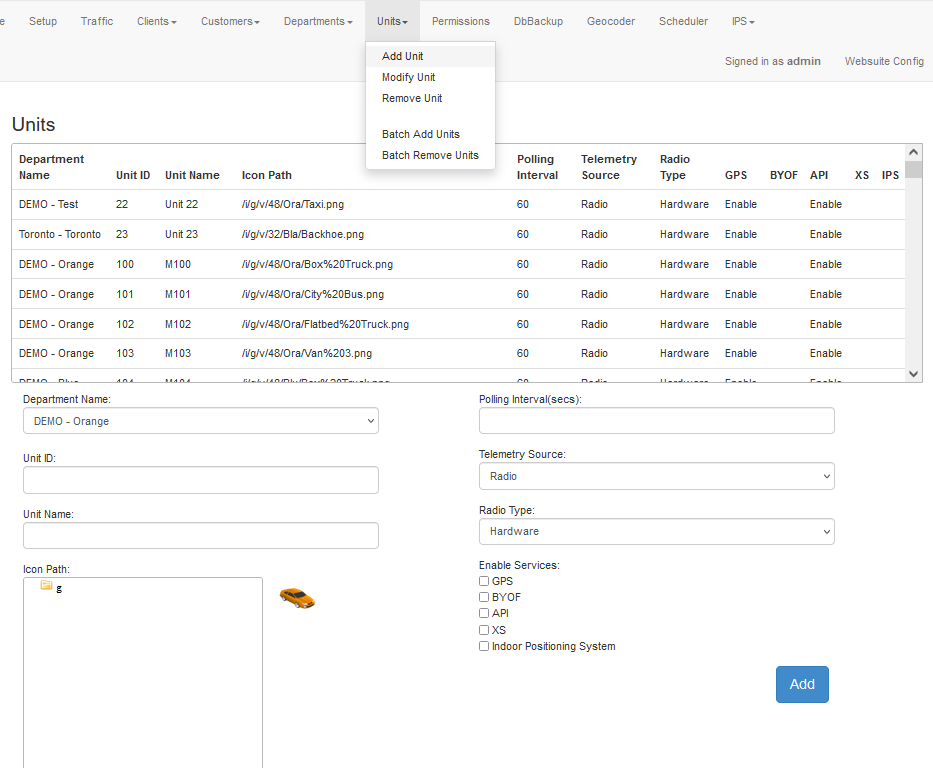
To access the page to add a unit, along the top navigation go to Units then Add Unit.
-
The displayed table is all the units already entered into the system. Each unit’s Unit ID must be unique make sure the Unit ID you want to add is not in this table.
-
Below the table is the form that needs to be filled in order to add a new radio to the system.
Enter the Department Name, Unit ID, and Unit Name.
Department Name – This is the department the new unit will belong to.
Unit ID – This it the ID the Unit will use. this should match the one used by the radio to identify itself on the radio network.
Unit Name – This is the human readable name that Clients will see in the Websuite.
-
Choose an icon to represent the Unit by using the Icon Path. You can see a preview of what the Unit will look like in the Websuite to the right of the input.
-
Enter the Polling Interval . This is the interval that the radio should report back their location in seconds.
Telemetry Source and Radio Type can be left as their default values of Radio and Hardware respectively.
-
Under Enable Services select the services to enable:
GPS: Required to enable the FleetManager to accept GPS reports from the Unit.
BYOF: Radios that will be using Bring Your Own Forms service.
API: Needs to be enabled if using an application that makes use of our JSON Client/Server API, an example being our General Gateway service.
XS: Radios that will be using XS services.
Indoor Positioning System: Needs to be enabled if using Indoor Positioning.
-
To save the new unit into the FleetManager click Add.
-
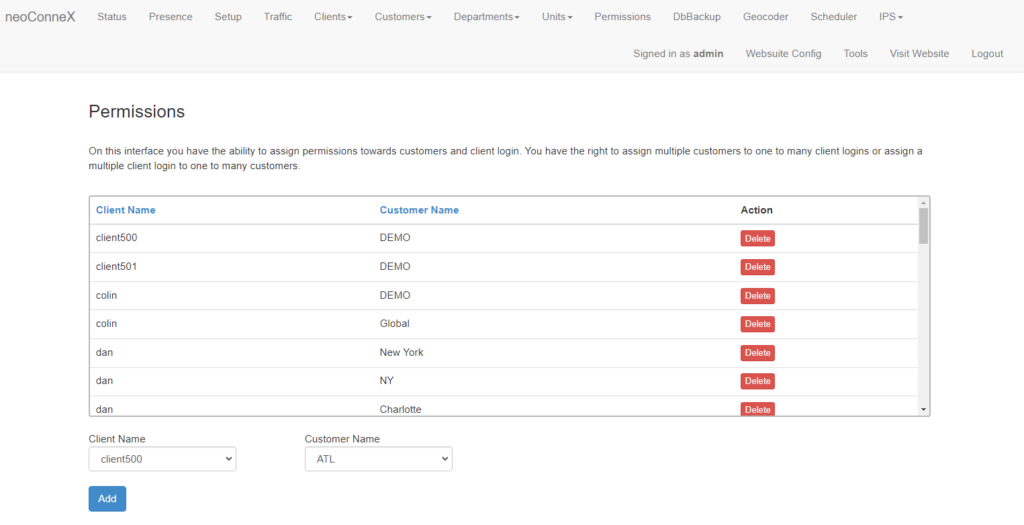
To add permissions to a client, choose Permissions from the top menu.
-
The displayed table will show clients and their permissions in the system once granted.
-
Below the table is the form that needs to be filled in order to provide access to a customer.
Select the Client Name and Customer Name from the dropdown menus.
Press Add to allow the Client access to the selected Customer. A client can be provided access to multiple customers, simply add another customer to the client permissions if desired.
After creating your Client and Customer, you will need to add permissions to the Client to access the created Customer.