
Adding a Client
-
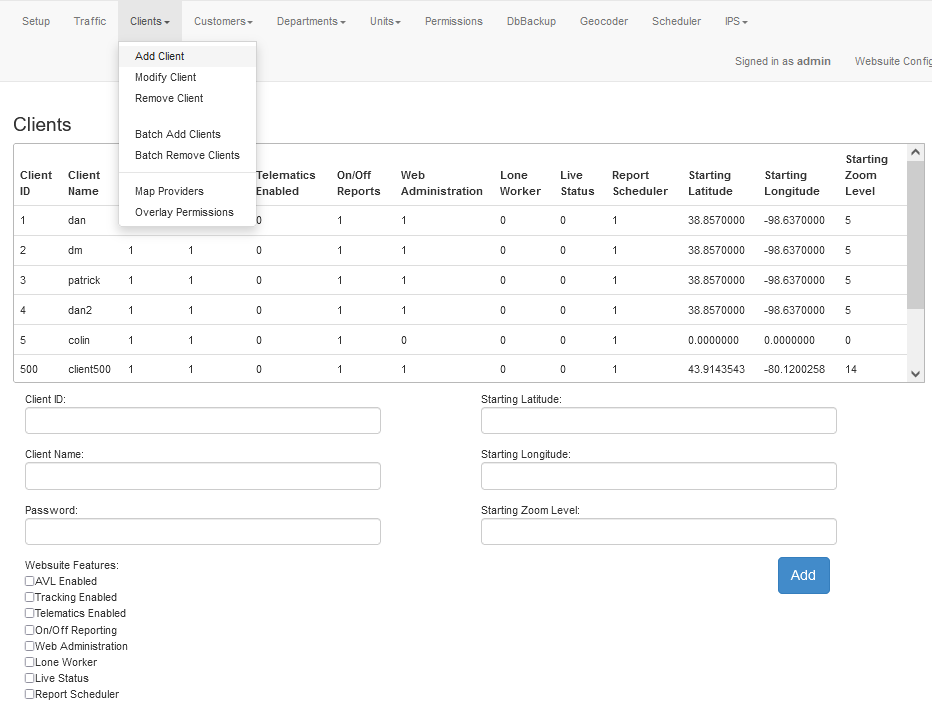
To access the page to add a client, along the top navigation go to Clients then Add Client.
-
The table displays all existing clients that have access to the Websuite. Each Client must have a Unique Client ID.
-
Below that table is the form used to add a new Client to the FleetManager.
-
Enter the Client ID, Client Name, the Password for the client.
Client ID – This will be used as the unique ID for the Client. This can not be changed later.
Client Name – This will act as the username for the Client to login to the Websuite with.
Password – This will be the password that the Client will need to use to login.
-
Select which Websuite Features the Client will have access to.
AVL Enabled – Select to allow the Client access to the Live AVL screen in the Websuite.
Tracking Enabled – Select to allow the Client access to the Tracking screen in the Websuite.
Telematics Enabled – Select to allow the Client access to the Telematics screen in the Websuite.
On/Off Reporting – Select to allow the Client access to the On/Off Reporting screen in the Websuite.
Web Administrator – Select to designate this client as a Web Administrator with the ability to modify Unit names.
Lone Worker – Select to allow the Client access to the Lone Worker screen in the Websuite.
Live Status – Select to allow the Client access to the Live Status screen in the Websuite.
Report Scheduler – Select to allow the Client access to the Report Scheduler screen in the Websuite.
-
Optionally Set the Starting Latitude, Starting Longitude, and Starting Zoom Level.
If left at default when the user logs in they will be shown the world map.
Starting Latitude – This will set the default latitude the map will be centred around when the Client logs into the Websuite.
Starting Longitude – This will set the default longitude the map will be centred around when the Client logs into the Websuite.
Starting Zoom Level – This will set the default zoom level of the map when the Client logs into the Websuite.
-
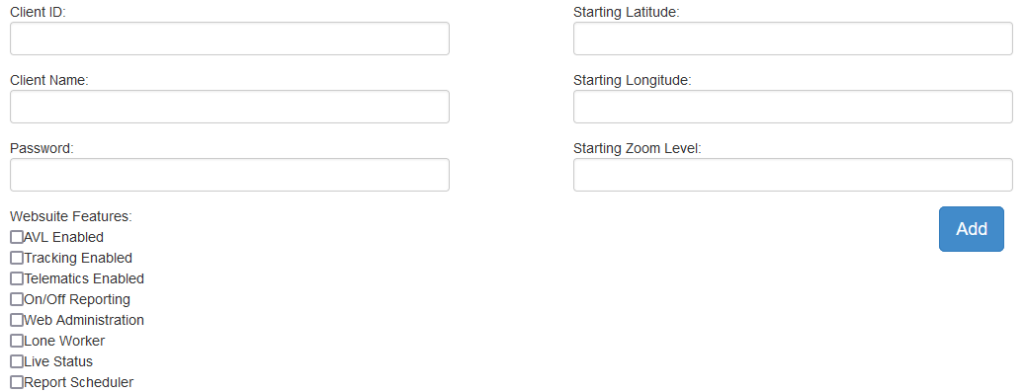
To add the Client click the Add button.
The following form needs to be filled out to grant a new client access to the Websuite.